Need to raise some funds? These Fall Bake Sale ideas are so unique and tasty, they’ll sell out quickly.
As the days grow shorter, the mornings turn crisp, and schedules quickly fill up, spooky-themed goodies and comfort treats are what people want.


That’s why fall bake sales are such a great idea!
These spooky-themed fall bake sale ideas will help you whether you're raising money for a school, supporting an organization, or just earning a little extra at home.
Hint: Here’s how to price your goodies so that you make a profit.
Fall Bake Sale Ideas
Whether you’re looking for candies or baked goods, you’ll find something below.
1. Bat Gems
Look at these cute bat gems! They’re so sparkly and completely edible.

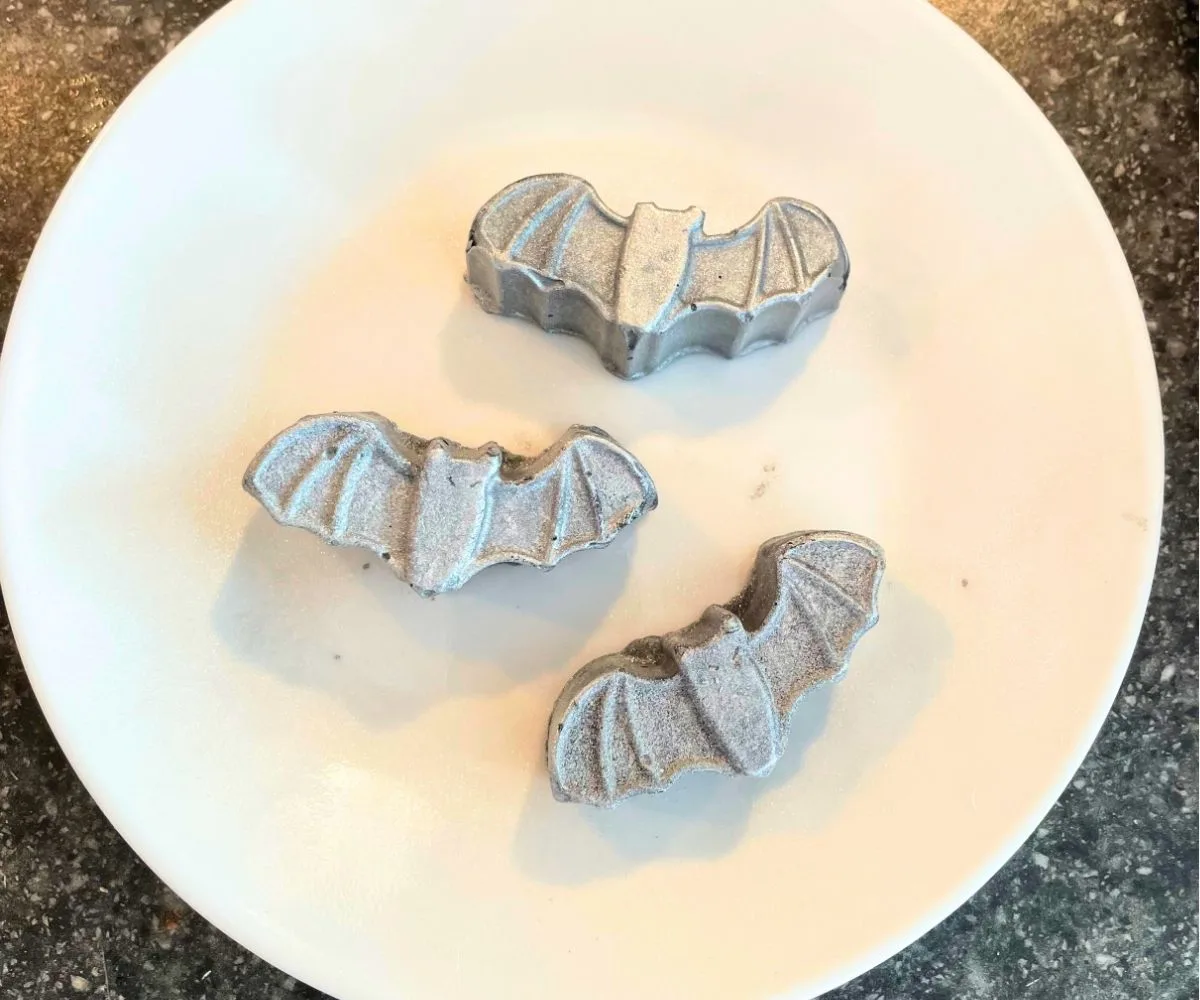
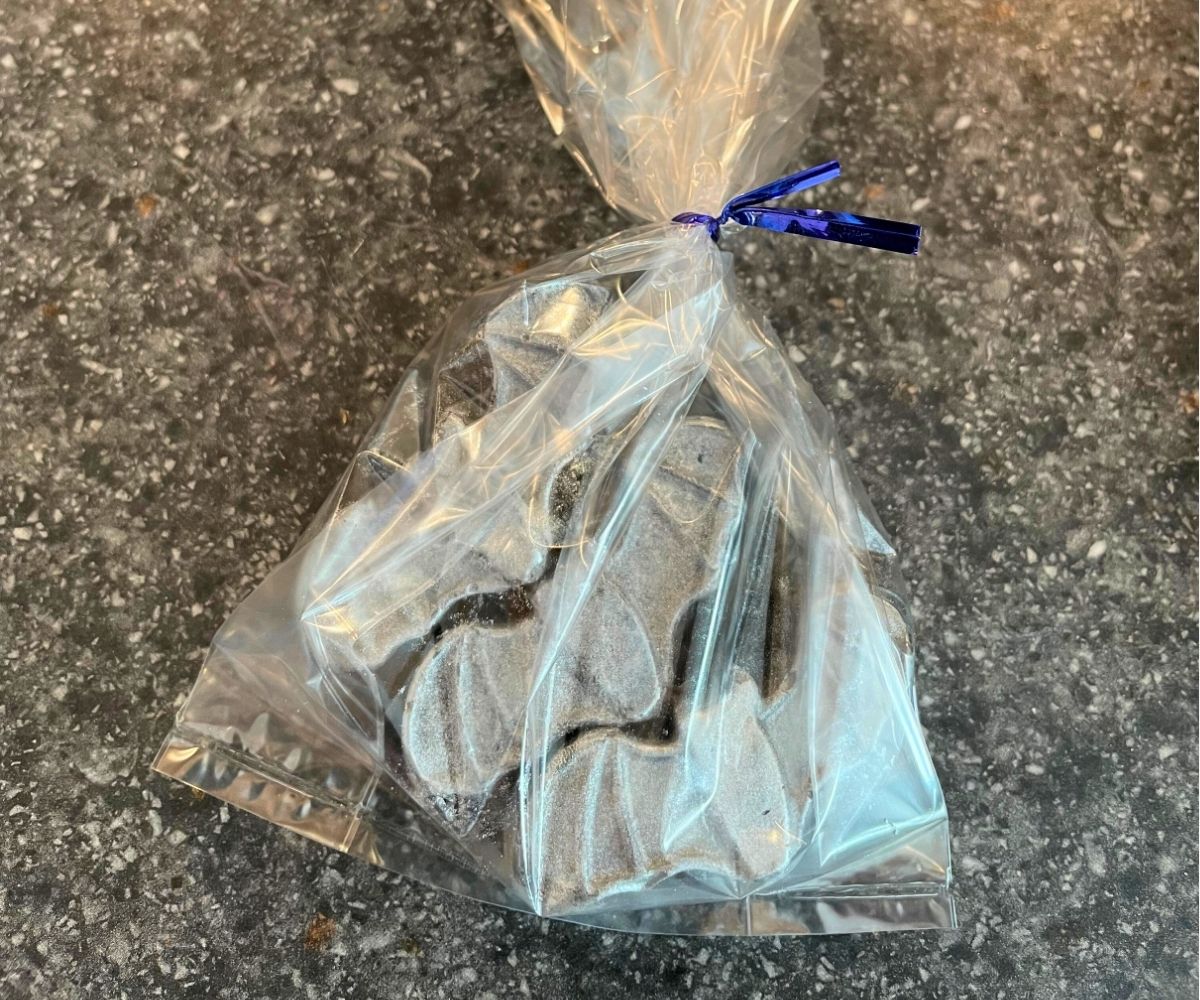

You can either package them up in sets of 3 or so, or let people choose the number of treats they want and price it according to each bat.
Ingredients:
- Candy Melts or Chocolate to Melt
- Bat Candy Molds
- Edible Glitter
Instructions:
- Melt the candy melts according to the package directions. OR, melt the chocolate in the microwave in 30-second stints. Stir in between.
- Fill the bat food mold with the melted candy melts or melted chocolate.
- Allow to cool and harden completely (you can put them in the fridge to speed this up).
- Put just a teaspoon or so of edible glitter into a small bag. Add in a bat, shake it around, and put it on a plate (you can blow away any extra glitter, fyi). Repeat with all bats.
- Package them up (I did 3 to a bag in my example).
2. Candy Corn Cookies
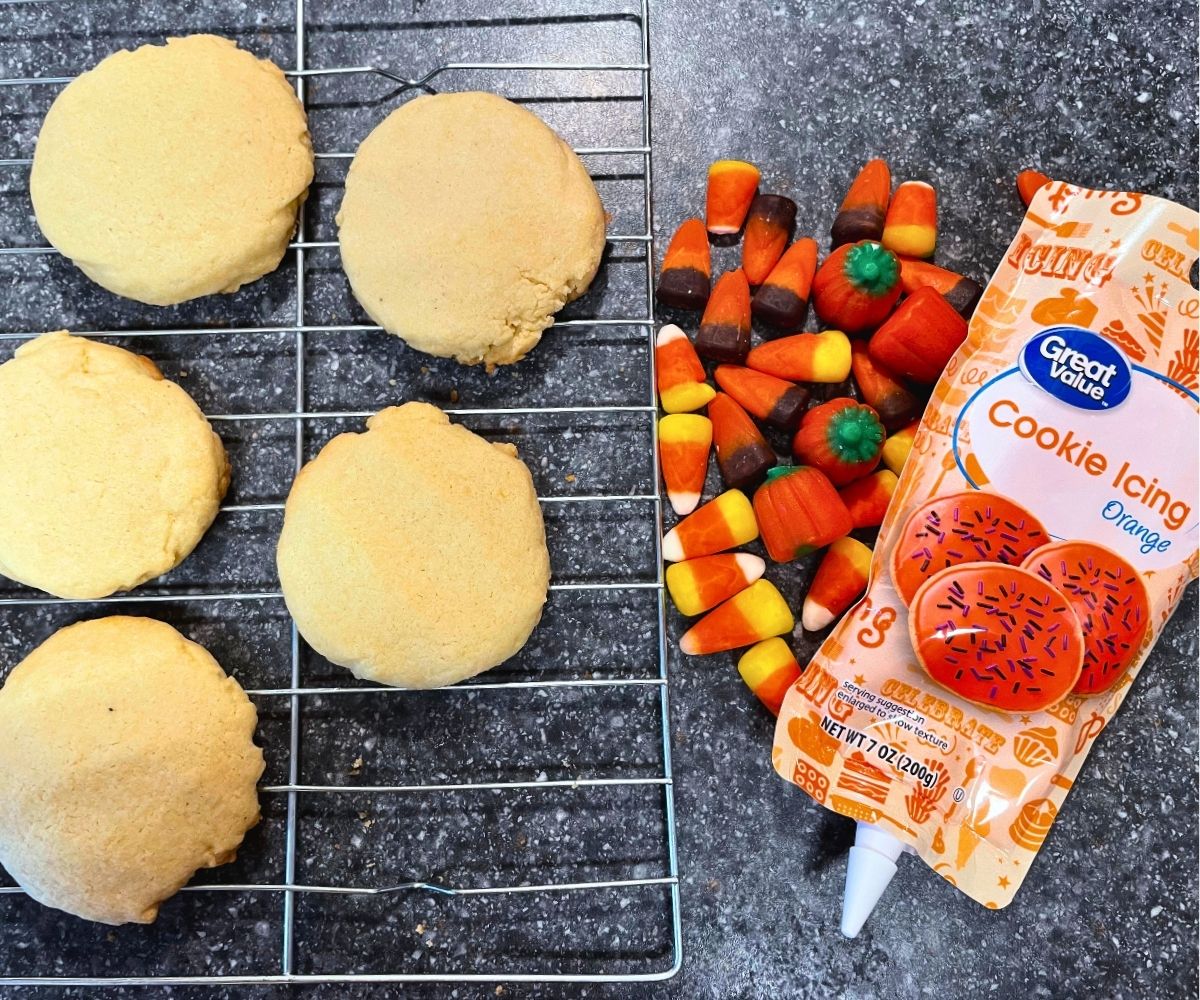

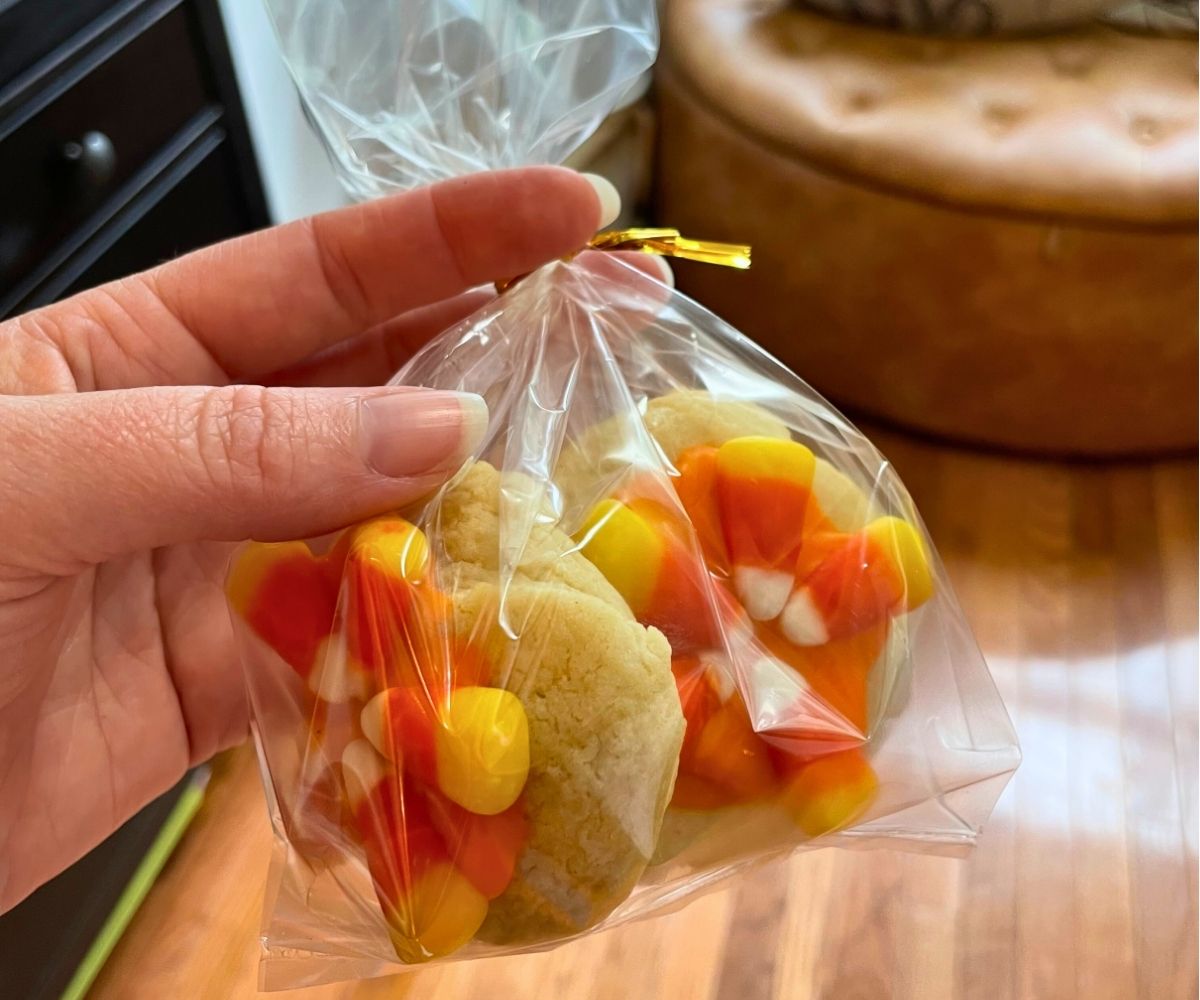

These are bright, colorful, and give all the Fall feels. Perfect for a fall bake sale!
Ingredients:
- Sugar Cookies (I used this recipe)
- Orange or yellow icing
- Candy Corn
Instructions:
- Make your sugar cookies. Allow to cool completely.
- Cover the sugar cookie top with icing.
- Before the icing dries, add in 3-4 candy corns in a pattern.
- Allow to cool and harden completely.
- Package up for sale.
3. Frankenstein Treats
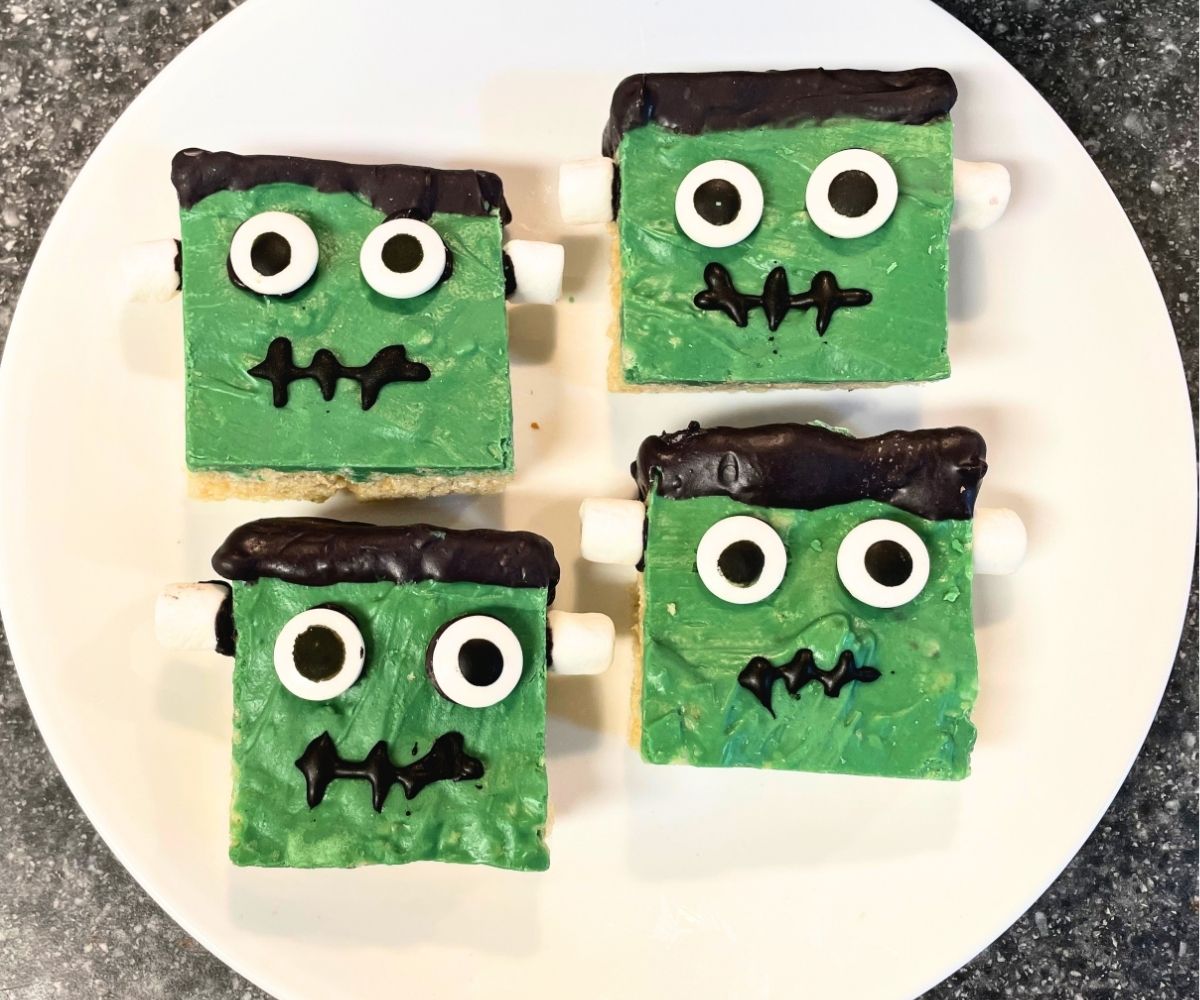

I have to admit: I think these are my favorite out of this whole bunch.
They were super fun to create, and I was so excited to share them with my husband and son when he got home from school!
Ingredients:
- Rice Krispies Treats
- Green Candy Melts
- Black Candy Melts
- Mini Marshmallows
- Large Candy Googly Eyes
- Black icing in a tube with a very small tube head (optional)
Instructions:
- Make a batch of Rice Krispies Treats, or buy a package of them premade.
- Slice the Krispies Treats into squares.
- Melt the green candy melts according to package instructions.
- Dip the top of each Rice Krispies treat into the green candy melt, and use a spatula to smooth the green over the entire face of it.
- Allow them to cool completely (you can put them in the fridge and they’ll cool quicker).
- Once cooled, melt the black candy melts according to package instructions.
- Dip the top part of each Frankenstein into the black candy melt, and cover about one inch as the “hair”. You can use a spatula or spoon to scoop the black candy melt towards the treat and cover it.
- Allow them to cool completely (you can put them in the fridge, if needed).
- Remelt the black candy melt (if the consistency changes, just add a little fat to it like shortening or vegetable oil).
- Put a small dab of candy melt where each eye should go, and “glue” your eyes onto your Frankenstein. Put a little dab on either side of Frankenstein’s head, and “glue” a mini marshmallow there.
- Optional: Take black icing, and paint a mouth onto each Frankenstein.
4. Owl Pops

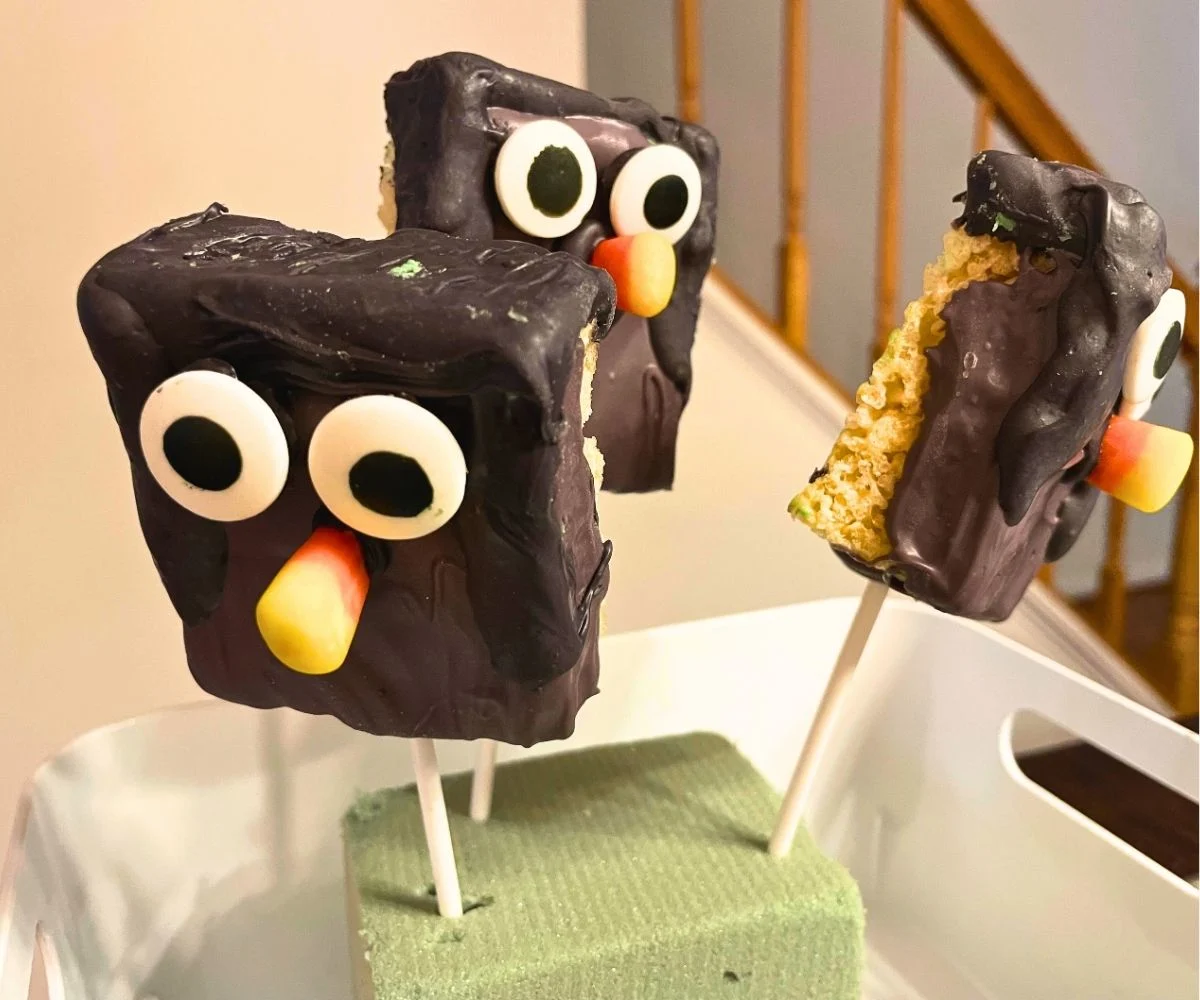
These Owl Pops made my husband, an owl lover, smile so much!
I think the candy corn nose seals it for me.
Ingredients:
- Rice Krispies Treats
- Red Candy Melts
- Blue Candy Melts
- Black Candy Melts
- Large Candy Googly Eyes
- Candy Corn
- Popsicle Sticks
Instructions:
- Make a batch of Rice Krispies Treats, or buy a package of them premade.
- Slice the Krispies Treats into squares.
- Melt equal parts of the red and blue candy melts according to package instructions. Mix together to make the color purple.
- Dip the top of each Rice Krispies treat into the purple candy melt, and use a spatula to smooth the purple over the entire face of it.
- Allow them to cool completely (you can put them in the fridge and they’ll cool quicker).
- Once cooled, melt the black candy melts according to package instructions.
- Dip the top part of each owl into the black candy melt, and cover about one inch as the “hair”. Also, put a strip of black candy melt down each side of the face for wings. You can use a spatula or spoon to scoop the black candy melt towards the treat and cover it.
- Allow them to cool completely (you can put them in the fridge, if needed).
- Remelt the black candy melt (if the consistency changes, just add a little fat to it like shortening or vegetable oil).
- Put a small dab of candy melt where each eye should go, and “glue” your eyes onto your owl. Put a little dab where the candy corn nose should go, and “glue” the nose there.
- Optional: Stick a popsicle stick about halfway into each treat.
5. Witch Potion Candy Packs

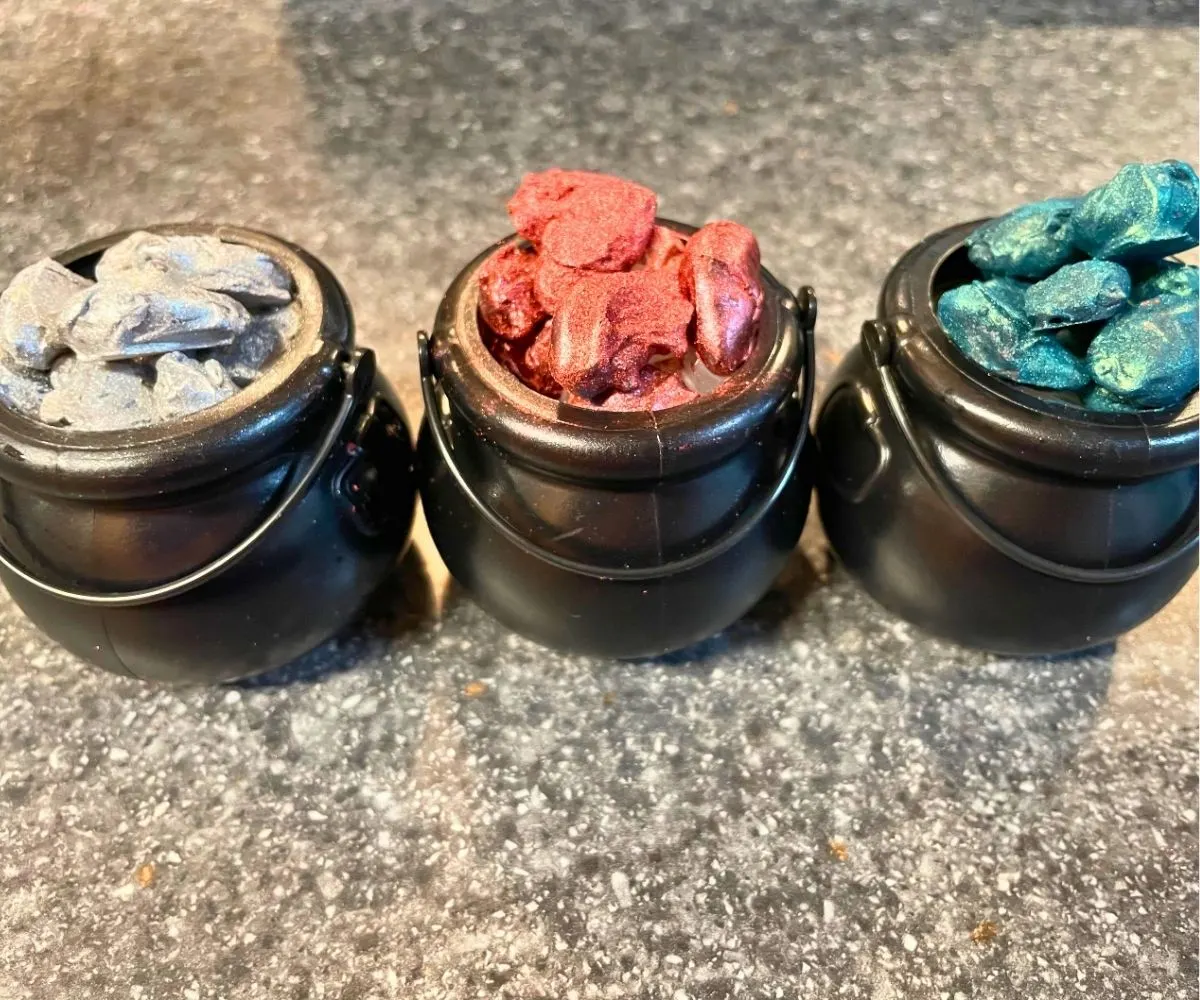
These are so fun!
You can make these candy-coated almonds, coat them in edible glitter, then market each color as a different ingredient in a witch’s potion (OR, as an ingredient potent enough to do something – like turn a person into a toad).
Ingredients:
- 1 16-oz. bag of Whole Almonds
- 1 12-oz. bag of White candy melts (or whatever color you’d like)
- 1 tsp. each edible Glitter (different colors)
Instructions:
- Melt a 12-oz. bag of candy melts according to package instructions. If the texture changes, simply add a ½ tbsp. of oil (like coconut oil or vegetable oil).
- Drop the almonds into the melted mix and stir to cover thoroughly.
- Use a slatted spatula or spoon to fish the almonds out. Lay them on parchment paper. Let them cool.
- Put about 1 tsp. of edible glitter into a small plastic bag, and add in 5-7 coated almonds. Shake up, then take them out and put them on a plate. Repeat for all of the coated almonds, in the different colors you’ve chosen.
- Allow them to cool and harden completely.
- Package them up to sell.
Decide how many you want to sell in a package, then let the customers choose which 3, 4, or 5 colors they want.
OR, create packages ahead of time with different colors and label them as various silly witch potion names.
Like:
- Dragon’s Breath Potion
- Zombie Brains Potion
- Boil’n’Bubble Potion
- Goblin Snot Potion
- Etc.
These are such fun ideas that’ll get good attention at your Fall Bake Sale. I hope you have great success with raising funds at your event!
More Easy Bake Sale Treats to Make
- 9 Easy Bake Sale Treats to Make
- 7 Rainbow-Themed Bake Sale Treats to Make
- 7 Simple Market Day Food Ideas to Make and Sell at School

Amanda L. Grossman is a writer and Certified Financial Education Instructor (CFEI®), a 2017 Plutus Foundation Grant Recipient, and founder of Money Prodigy. Her money work has been featured on Experian, GoBankingRates, PT Money, CA.gov, Rockstar Finance, the Houston Chronicle, and Colonial Life.
Amanda is the founder and CEO of Frugal Confessions, LLC. Read more here or on LinkedIn.